Welcome to our new GoCollect 101 video series, where we provide tips and tricks on how to use GoCollect to maximize your collecting potential!
In our first installment, we're covering the basics of Lists and Trackers! Whether you want an extremely detailed collection or something to simply track the books you're buying, there's something here for everyone.
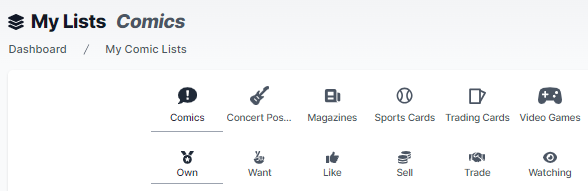
Unfamiliar with GoCollect's Lists? Let us talk you through it.
These tools are a great way to manage your collection. Our tech team has packed so much detail into our Lists, creating a seamless system for tracking collections, receiving alerts, and documenting values. Make sure to sign up for a free subscription for basic access.
I highly encourage you to watch the video above - it's easy to follow and explains Lists very clearly - but if you're more of a reader, here is the breakdown.
- Select Comic to add
- From the Comics page, click “Add to List” and select “My Comics.”
- Select Notification Preferences. (GoCollect Pro subscribers have the option to get notified when the comic is available through one of our partners, each time it’s sold, or when there are new highs!)
- Move to Edit Details section - enter details
- Take a picture of your book and upload it (optional)
Here’s a tip: if you’re tracking a raw book and get it graded, add the grading cost to your price paid. Grading cost is no joke, it can be anywhere from $15 to hundreds of dollars depending on its value. For the most accurate profit possible, document your grading cost!
Keep up with all your Wants
It’s super easy to keep track of comics you want to buy, all you do is click the “Want icon” and choose your notification preferences. You can also add and remove books from your Want Lists after you add or remove them within your collection.

One more tip? You've got it. If you're adding a graded comic, all you need to do is select the grading company and then enter your certification number, which can be found above the barcode.
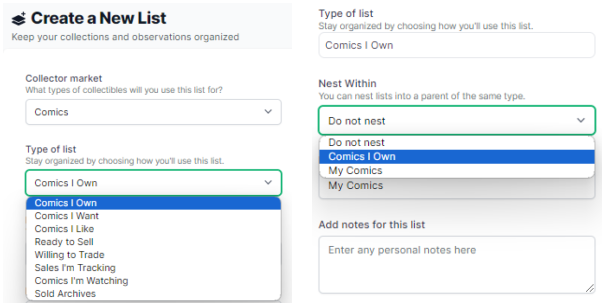
What if we have duplicate copies of the same book?
Well, the first thing we can do is create some nested lists. Nested lists are lists that we can put within other lists. Making a whole new list is great if the list is for someone other than yourself, like a business entity, friend, or family member. To create a nested list, fill out the “Create a New List” widget, select the list you want to nest within, and click “Create List.”
All we have to do to move that copy to our new nested list is select the item, click move, and confirm the move.
At the top of the page, you'll see the summary statistics of the value of your collection. As FMVs change or you change your personal estimates, that will be reflected here.
And with that, our work is done!
Hopefully, you learned something new about how to use GoCollect Lists to track your collection. If you have any questions, or any suggestions for other features you want to see us dive into, leave us a comment!